Tuesday, August 26, 2008
Welcome Back Preschoolers!!
Monday, May 19, 2008
Curious Gerorge!
Tuesday, May 13, 2008
Knock! Knock!
I taught the preschoolers how to tell knock knock jokes by telling them what to say and when. As time has gone on, they're coming up with their own versions.
Some of our favorite knock knock jokes:
Knock Knock Who's there? Lettuce. Lettuce who? Lettuce in, it's cold out here.
Knock Knock! Who's there? Moo. Moo, who? Well, make up your mind, are you a cow or an owl?
Knock Knock! Who's there? Ya. Ya who? What are you getting so excited about?
Knock Knock! Who's there? Boo. Boo who? Don't cry. It's only me.
Knock Knock! Who's there? Banana. Banana who? Knock Knock! Who's there? Banana. Banana who? Knock Knock! Who's there? Orange. Orange who? Orange you glad I didn't say banana?
Monday, May 12, 2008
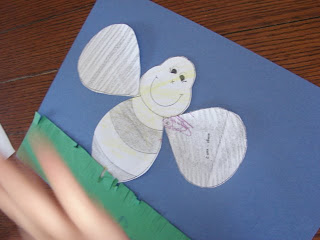
Ladybug Love

 The antennas were curled with a pencil.

 Once complete, the children enjoyed flying their ladybugs
 throughout the play area!

Miss Melissa, You Deserve This!
I said, "Thank you! I needed a map!"
With the biggest smile on her face she said, "I think you deserve this!"
She then told me "You better keep this on the "fridgerator" so you don't lose it."
Friday, May 9, 2008
Mother's Day Q & A
To complete this, ask your preschooler the following:
Top 10 Reasons I Love My Mom:
10) I love my mom because she reads me:
Some of the funnier answers I received were:
* I love my mom because she finds time to eat.
* I know my mom is smart because she watches TV.
*My mom is the best mom ever!
Planting a flower for Mom!

 I set up a workstation for the kids to use to create their flowering pot.
 Each child decorated the outside of their pot (sand bucket purchased for $1/ea) with the stickers provided.
 I then hot glued each clothespin to the corresponding flower for each child.
 Each child was given a teeny tiny seed to put in their pot.
We discussed how this little seed would grow into the beautiful flower I had printed on the "How to grow" information sheet.

 Once complete, I added a little water and allowed the flowerpots to sit in the sun.
This is one gift I'm sure all the mother's will love!

Thursday, May 8, 2008
Mother's Day Photo Magnet
After printing and having the children color the I love mom template, I cut each one out and glue the "I" to the heart.
When I worked outside the home, I always enjoyed decorating my desk and filing cabinets with crafts my kids made. I felt a magnet frame would be the perfect office accessory for our moms.
When complete each mom had a photo of their child working on this project in the perfect handcrafted frame.

Mother's Day: Flowering Photo
After printing a simple flower template and having the children color it, the older children were given a pair of scissors to cut their frame out.
 A photo of themselves was placed in the middle of the flower.
 Each child was then given a green pipe cleaner to use for the stem of the flower.
 We glue a single petal around the stem of the flower before allowing them dry.
 Once finished, I had the most beautiful boquet of flowers!
Wednesday, April 30, 2008
It's time to play ball!!
For today's game, I grabbed my bag of 100 colored balls, emptied 6 containers in different sizes and taped a piece of colored construction paper on the front of each one.

"Max, please collect 5 orange balls."


For instance, "Max, please collect 3 orange balls along with 2 pink balls."
Once he collected the appropriate balls, I asked him,

The children would then have to divide their colored balls and place them in the appropriate spot.

When the games were over, each child was given a bucket to collect and was responsible for putting them away.
Tuesday, April 29, 2008
Do you love me????

Typically it's the "My mom said this..." or "My dad did that..." kids comparing stories and bringing plenty of imagination into the details.
Today one of my preschool girls decided it would be fun to follow one of the boys around the dining room before lunch. Every place he moved, she moved next to him.
Just when he had had enough he said, "Melissa...XXX won't stop following me!"
I said, "That's because she likes you!"
He sat down at what we call the little table, she sat across from him and he stated in a firm voice, "DO YOU LOVE ME???"
The little girl nodded her head yes.
The more than frustrated boy shook his hands out in front of him and stated, "Then STOP following me!!!"
Friday, April 25, 2008
Number book!
 Each page has a new number (1-10) along with an easy to remember poem about how to write the number.
 Each child is given a number worksheet to work on while we learn how to write each number.
 To continue this game into free play, I asked the children to bring me 4 of any particular toy.
Thursday, April 24, 2008
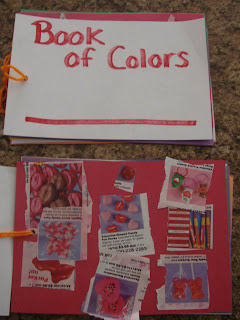
Book of Colors!


